The Four Things You Can Control About Flash
Every tool on this page changes one of four qualities of your Speedlite’s light: its softness, its direction, its spread, or its colour. Knowing which quality you’re trying to fix tells you which tool to reach for.
- Softness depends on the size of the light source compared with your subject. Bigger and closer means softer shadows.
- Direction comes from where you place the light, so it’s set by your stand position, not a modifier.
- Spread is how much of the scene the light reaches. Grids, snoots and flags narrow it.
- Colour is changed with gels, either to match other light in the scene or to add colour on purpose.
This guide assumes you’re comfortable with manual flash power and have already started getting flash off-camera first. If power settings still feel shaky, our TTL and manual flash guide covers the basics.
Softening Light: Umbrellas, Softboxes and Diffusers
To soften a Speedlite, make it bigger relative to your subject. A bare flash head is about the size of a matchbox, so it throws hard, crisp-edged shadows. Fire it through a 90 cm umbrella and the light source is suddenly the size of the umbrella.
Distance matters just as much as size. An 80 cm softbox 1 metre from a face is large compared with that face and gives soft, gradual shadows. Pull it back to 3 metres, and it looks a third of the size from your subject’s position, so the shadows harden. It also loses about three stops of light, because of the inverse square law.
| Modifier | Light quality | Control over spill | Best for |
| Shoot-through umbrella | Soft, wide | Low: light goes everywhere | First portraits, groups, quick setups |
| Reflective umbrella | Soft, slightly punchier | Low to medium | Portraits where you need more output |
| Softbox (60 to 90 cm) | Soft, even, defined edge | Medium to high | Portraits and products, square or octagonal catchlights |
| Diffusion dome or bounce card | Slightly softer than bare flash | Low | On-camera bounce flash, not much use off-camera |
Every layer of diffusion costs light. As a rough guide, expect to lose one to two stops through an umbrella or softbox compared with bare flash, so raise your power or move the light closer.
Try feathering once your light is in place. Instead of aiming the centre of the softbox at your subject, turn it so the front edge of the light falls on them. The edge of a softbox is softer and dimmer than its centre, so you get a smoother fall-off from highlight to shadow, and less light spills onto the background.
Restricting Light: Grids, Snoots and Flags
When light is reaching places you don’t want, add a grid, snoot or flag. Softening tools spread light out, and these tools hold it in.
- Grids are honeycomb panels that fit over a flash head or softbox. They’re rated in degrees, and a smaller number means a tighter beam: a 20-degree grid makes a small, defined pool of light, while a 40-degree grid gives a broader one. Grids are ideal for hair lights and background spots.
- Snoots are tubes that fit over the flash head and narrow the light to a small circle. Use one to pick out a single detail, such as a product label or a strip of light across a face.
- Flags are any black, opaque card or panel placed between the light and something it shouldn’t hit. A flag between your key light and the camera lens stops flare. A flag between the light and the background keeps the background dark.
A useful habit: after every test shot, check what the light touched that it shouldn’t have. Spill onto the background or into the lens is usually solved with a flag, not by moving the light.
Reflectors: The Modifier That Needs No Power
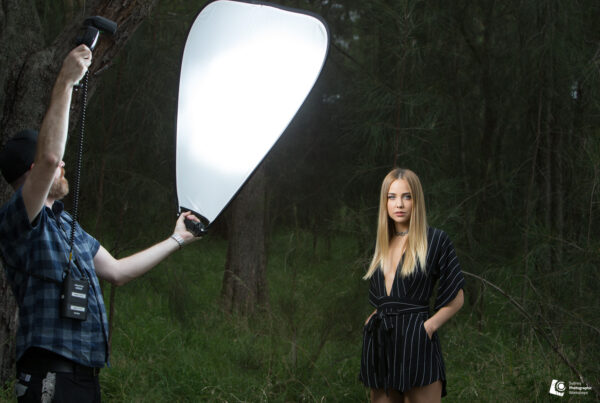
A reflector redirects light you already have, so it adds fill without adding a second flash. A five-in-one reflector gives you five surfaces in one fold-up disc:
- White gives soft, subtle fill.
- Silver gives brighter, crisper fill, roughly a stop more than white at the same distance.
- Gold adds warmth to skin tones.
- Black subtracts light. This is called negative fill, and it deepens the shadow side for more drama.
- Translucent acts as a scrim, a diffusion panel you fire through to soften a bare flash or harsh sun.
For a one-light portrait with the key at 45 degrees, hold the reflector on the opposite side, angled toward the face, about 0.5 to 1 metre away. Moving it closer brightens the shadows. Moving it further away lets them deepen again.
Gels: Correction and Creative Colour
A gel is a thin sheet of coloured film placed over your flash head. Gels do two very different jobs, correcting colour so your flash matches other light in the scene, and adding colour on purpose.
Correction gels
Speedlite light is close to daylight in colour, around 5500 K on the Kelvin scale (the measurement used for colour temperature). Indoor tungsten bulbs sit closer to 3200 K, which looks orange beside flash. Mix the two and your subject looks blue while the room looks orange. Correction gels fix that mismatch.
| Gel | What it does | Typical use |
| Full CTO (colour temperature orange) | Warms flash from about 5500 K to about 3200 K | Matching tungsten room light |
| 1/2 CTO | Warms to about 3800 K | Matching warmer household lighting, or warming skin |
| 1/4 CTO | Warms to about 4600 K | A subtle warm, late-afternoon feel |
| CTB (colour temperature blue) | Cools the flash | Matching cooler daylight or creating a cold mood |
| Plus green | Adds green | Matching fluorescent lighting |
A full CTO absorbs roughly two-thirds of a stop of light, so nudge your power up after gelling.
One gel trick is worth learning on its own. Put a full CTO on your flash, set your camera’s white balance to tungsten, and shoot at dusk. Your subject, lit by the gelled flash, looks natural, while the sky and background, lit by daylight, turn a deep blue.
Creative gels
Saturated colours such as blue, red and magenta are mostly used on backgrounds and rim lights. Saturated gels absorb more light, often a stop or more, so start with higher power.
To keep the colour rich, stop your key light from reaching the background. Place your subject at least 1.5 to 2 metres in front of the wall, and flag the key if needed. Any white key light that hits the background will wash the colour out.
Gobos: Shaping Light With Shadows and Patterns
A gobo, short for “go between”, is anything placed between your light and your subject to cast a shaped shadow. It’s how photographers fake window light, venetian-blind stripes or dappled shade under a tree, all inside a studio.
You can make one from black card with shapes cut into it, a real window frame, leafy branches or a commercial pattern. A cucoloris, or cookie, is a gobo with random irregular holes that breaks light into a natural, dappled pattern.
How sharp the pattern looks depends on distance:
- For crisp shadows, use a hard light (a bare Speedlite zoomed to its narrowest setting, or snooted), place the gobo close to the subject or wall, about 30 to 50 cm away, and keep the light 2 to 3 metres behind the gobo.
- For soft, out-of-focus patterns, move the light closer to the gobo and the gobo further from the subject.
Optical projection attachments, which use a lens to focus metal pattern discs, give the sharpest results from a Speedlite, though a simple card gobo is the best way to learn how the distances work.
A Two-Speedlite Setup: Soft Key Light and Gelled Background
This setup combines a modifier, a grid and a gel, and it’s one of the most useful ways to practise everything above. It produces a soft, flattering portrait with a coloured glow behind the subject’s head.
Lighting diagram brief (for the designer): overhead view. Subject 2 m in front of a plain wall. Key light in a softbox at 45 degrees camera left, 1 m from the subject. Background light directly behind the subject, 1 m from the wall, aimed at the wall. Camera directly in front.
The setup:
- Background: a plain grey or white wall, with your subject standing 2 metres in front of it.
- Key light (Speedlite 1): in a 60 to 80 cm softbox at 45 degrees to one side, slightly above eye level and angled down, about 1 metre from your subject. Put it in group A and start at 1/8 power.
- Background light (Speedlite 2): bare, with a 20 or 30 degree grid and a saturated gel. Place it on a low stand directly behind your subject, hidden by their body, about 1 metre from the wall and aimed at the wall behind their head. Put it in group B and start at 1/16 power.
- Camera: manual, ISO 100, f/5.6, at your sync speed (often 1/200 of a second). These settings remove most room light so only your flashes show.
Build it one light at a time:
- Take a frame with both flashes off. It should be almost black, which tells you the room light isn’t contaminating the shot.
- Turn on the key only. Adjust its power until the face is correctly exposed.
- Turn off the key and turn on the background light. Adjust the glow: move the flash closer to the wall for a smaller, more intense spot, or further away for a larger, softer one. Change its power to set the brightness.
- Turn both on and shoot.
- Fine-tune. If the coloured glow looks washed out, flag the key light so it stops spilling onto the wall. If the shadow side of the face is too dark, add a white reflector opposite the key.
To practise gobos with the same setup, take the grid off the background light, zoom it to its narrowest setting, and place a window-pattern gobo 30 to 50 cm from the wall. You’ll swap a coloured glow for a shaft of “window light” without changing anything else.
Once two lights feel comfortable, the next step is adding a rim or fill light. Our guide to multi-light Speedlite setups covers lighting ratios and three-light portraits, products and reflective surfaces.
Practise Gels, Gobos and Modifiers With a Tutor
You can read about grids and gels all day, but you learn them fastest by swapping one modifier for another and watching the frame change. Doing that with a tutor beside you means you find out why something didn’t work, not just that it didn’t.
The Intermediate Speedlite workshop at Sydney Photographic Workshops is built around this. Over five hours in the Alexandria studio, you use gels, gobos and modifiers to light both the subject and the background, build setups with two or more off-camera Speedlites, and shoot a professional model and still-life subjects. Groups are capped at eight, and SPW lends Speedlites if you don’t have enough of your own. You’ll need to be confident in manual mode, and if flash is still new to you, booking it together with Speedlite Essentials takes $50 off the pair.
Frequently Asked Questions
What is a gobo in photography?
A gobo, short for “go between”, is any object placed between a light and the subject to cast a shaped shadow, such as window-frame or venetian-blind patterns. Keep the gobo close to the subject and the light further back for sharper shadows.
What does a CTO gel do on a flash?
A CTO (colour temperature orange) gel warms your flash so it matches indoor tungsten lighting. A full CTO shifts flash from about 5500 K to about 3200 K, while 1/2 and 1/4 CTO give smaller shifts.
Should I use a softbox or an umbrella with a Speedlite?
An umbrella is cheaper, faster to set up and spreads light widely, which suits first portraits and groups. A softbox gives you more control over spill and a cleaner catchlight, which suits portraits and products where the background matters.
How do I stop my flash from lighting the background?
Move your subject at least 1.5 to 2 metres from the background, add a grid to narrow the beam, or place a black flag between the light and the background. Feathering the light toward your subject also reduces spill.
Do gels reduce flash power?
Yes. A full CTO absorbs roughly two-thirds of a stop, and saturated creative gels often absorb a stop or more. Raise your flash power or move the light closer after adding a gel.
What is a good first two-Speedlite setup?
Use one Speedlite in a softbox at 45 degrees as the key light, about 1 metre from your subject, and a second bare Speedlite with a grid and coloured gel behind them, aimed at the wall. Start the key at 1/8 power and the background at 1/16.