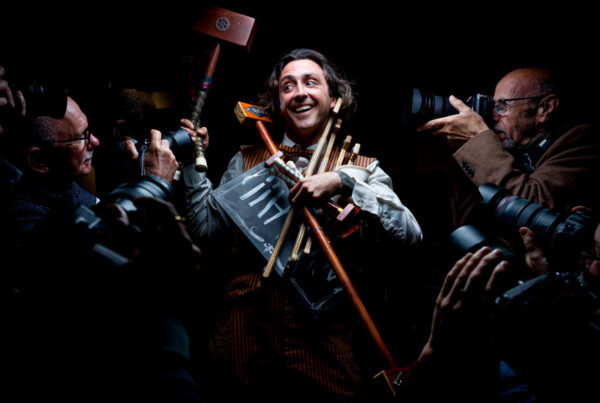
Most people who come to our Portrait Photography Workshop already know their way around a camera. But put a person in front of them and suddenly there are a whole lot of other things to think about.
Where should the subject stand? What light should you use? How much of the background belongs in the picture? Which lens will give you the result you’re after? And how do you direct someone without making them feel completely self-conscious?
These are the sorts of decisions we work through during our full-day Portrait Photography Workshop. We spend nine hours photographing two professional models in real locations around Sydney, exploring available light, composition, subject direction and artificial lighting.
There are demonstrations throughout the day, but much of the learning comes from having the opportunity to try things yourself, see what works and understand why.
Starting the Day at Our Alexandria Studio
The day starts at our Alexandria studio at 9 am, where I’ll introduce the programme, show some examples of my work and explain how we’ll approach the different shoots.
I also like to hear what everyone hopes to get out of the day. Some students want to improve their confidence working with people, while others are particularly interested in lighting, lens selection or making more interesting portraits outside a controlled studio environment. Knowing what you’re interested in helps me tailor the instruction as we go.
We’ll spend some time looking at equipment and the decisions that need to happen before you begin photographing. I prefer to get the technical side sorted early so that once you’re working with a model, your attention is on the person and the photograph you’re trying to make, rather than constantly looking down at your camera.
From the studio, we head out to our first location. The locations change between workshops, and part of the enjoyment for me is discovering interesting environments and exploring how we can use them photographically.
The Morning Session: Working with Available Light
We generally begin the first shoot using the light that’s already there. Before introducing additional lighting equipment, I want students to recognise where the light is coming from, what it’s doing to the subject’s face and how the environment might contribute to the photograph.
At one of our recent workshops, we spent the morning photographing a model aboard a historic ferry undergoing restoration at a heritage boatyard. With beautiful natural light coming through its windows and plenty of interesting architectural details, it was a terrific location for exploring environmental portraiture. Although having an interesting location doesn’t automatically give you an interesting photograph.
There were windows, structural elements, curved surfaces and all sorts of shapes competing for attention. We needed to decide which parts of the environment were helping the portrait and which were getting in the way.
Sometimes that meant moving the model a little closer to a window. Other times it meant changing our camera position or using a different focal length to alter the relationship between the subject and the background. Small changes could produce quite different photographs.
That’s something I particularly enjoy demonstrating. You don’t necessarily need more equipment or a different location. Often you need to look a little more carefully at what you already have to work with.
Working with the Models
We work with two professional models throughout the day, giving students experience with different subjects and photographic approaches. The casting varies depending on the locations and theme of the workshop. We might work with a fashion or beauty model in one session and a character model in another.
I’ll usually begin by demonstrating how I approach a particular setup, explaining the decisions I’m making about light, composition and the way I’m directing the subject. Students then have the opportunity to work directly with the models and explore their own ideas.
That might mean refining a composition, trying a different camera position or asking the model to change their stance or expression. If something isn’t working, we’ll look at why. Perhaps the background is distracting, the light is falling awkwardly across the face, or the model looks uncomfortable in the position you’ve asked them to hold.
I tend to approach subject direction as a process of small adjustments rather than working through a collection of predetermined poses. You begin with something that feels natural, see how the person responds and gradually refine the photograph.
I don’t expect everyone to make the same picture. In fact, it’s much more interesting when students begin noticing different possibilities in the same location. There’s plenty of opportunity to ask questions, experiment and work through the decisions involved in making your own photographs.
Exploring Lenses, Composition and the Environment
Another important part of the day is understanding how lens choice and camera position affect a portrait.
You might begin with a fairly conventional head-and-shoulders composition, then step back to include more of the environment. Or perhaps you’ll move closer and concentrate on expression and detail.
A wide-angle lens used close to somebody can exaggerate perspective, while a longer lens used from further away can produce a very different relationship between the subject and background. Neither approach is automatically better. It depends on the photograph you’re trying to make.
We also look at how to use backgrounds deliberately. Sometimes the location provides context and helps tell us something about the person. Other times it becomes a distraction, and a simpler composition produces a much stronger portrait.
These differences are far easier to appreciate when you’re looking through the camera and seeing the results for yourself. And you don’t need to arrive with a bag full of expensive lenses. Bring what you own. There’s plenty to learn from working with a single lens and exploring what it can do.
The Afternoon Session: Introducing Artificial Light
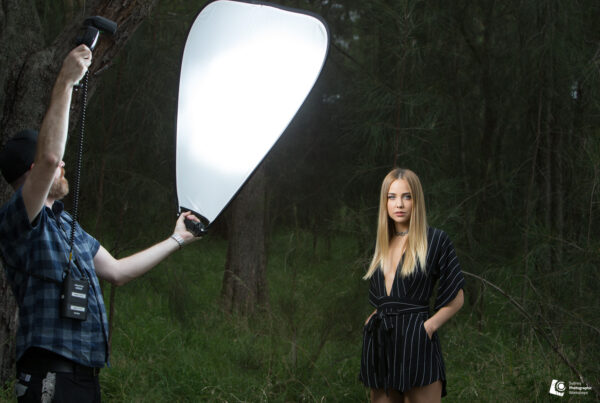
As the day progresses, we start looking at how to supplement or modify the available light. Depending on the conditions, we may use reflectors, diffusion or continuous lighting before introducing flash.
A small Speedlite can be surprisingly useful on location. You may have found a background you really like, but the subject isn’t receiving enough light. Or perhaps the existing light is coming from a direction that doesn’t suit the portrait. Adding a little light can solve those problems without necessarily changing the character of the location.
During that same workshop, the afternoon took us into a beautiful timber-lined interior, with natural light entering through small portholes. We began working with that existing light before introducing Speedlites to give us more control over the portraits.
It was a very different environment from the morning session, and that’s part of the idea behind the day’s progression. As the lighting becomes more challenging, you begin drawing on the techniques you’ve already practised.
Depending on the location and conditions, we may also work with larger battery-powered flash equipment. The exact equipment changes according to what we’re trying to achieve. What matters is understanding why we’re introducing it and what difference it’s making to the photograph.
A Full Day of Photography, with Time to Experiment
The workshop has a structure, but I like to leave room for things to develop. Location photography rarely goes exactly as you imagined.
The light changes, a position that looked promising doesn’t work from your chosen camera angle, or somebody notices another interesting background. Sometimes a small change in the model’s stance produces something worth exploring further. Those moments often lead to useful demonstrations and discussions that weren’t necessarily part of the original plan.
We keep classes small, with a maximum of 10 students, so everyone has opportunities to photograph, ask questions and receive guidance. There’s a catered lunch and refreshments during the day, and we arrange transport between locations where required.
We finish back at our Alexandria studio at 6 pm. By then, you’ll have worked with different subjects, lighting conditions and compositions, with plenty of opportunities to make photographs of your own.
I hope you’ll also have a better understanding of the decisions that went into making them. Being able to recognise why a particular photograph works, and knowing what to change when it doesn’t, is something you can take into your own photography long after the workshop.
Is the Portrait Photography Workshop Right for You?
This workshop is designed for people who already have a reasonable understanding of their camera and want to develop their portrait photography.
You don’t need to be an experienced portrait photographer, but you should be comfortable with the basic controls and have some understanding of exposure, aperture, shutter speed and ISO. If you’ve completed our 8-Week Beginner Photography Course, or have equivalent knowledge, you’ll have a suitable foundation.
Bring a DSLR or mirrorless camera with interchangeable lenses and full manual capability, along with the lenses you own, charged batteries and memory cards. A tripod is useful if you have one, as we sometimes incorporate them into exercises involving composition and subject direction.
Comfortable clothing and sensible shoes are also a good idea. We’re often working in interesting locations that aren’t necessarily conventional photographic studios.
Throughout the day, you’ll have the chance to observe how I approach a shoot, try the techniques yourself and become more comfortable working with people. You’ll also begin to develop your own way of looking at light, composition and the possibilities a location offers.
For upcoming dates, current pricing and full workshop details, visit the SPW Portrait Photography Workshop page. You can also call us on (02) 9699 4255 or submit an enquiry through our online contact form.